Monday, July 27, 2009

Blueberry Whole Wheat Muffins

These are healthy muffins. If you want a sweet, dessert-type muffin, go elsewhere. I felt zero-guilt grabbing one of these bad boys to curb a carb craving - at ~90 calories and 5 g protein each, they are a great snack.

Blueberry Whole Wheat Muffins
kind of adapted from Katie's Raisin Bran muffins
makes 12 muffins

1 c. wheat germ
1 c. skim milk
1/3 c. unsweetened applesauce
2 Tbsp plain lowfat yogurt
1 egg
1 tsp vanilla extract
5 1/2 Tbsp Splenda Brown Sugar Blend
1 c. whole wheat flour
1 tsp baking powder
1 tsp baking soda
2/3 tsp salt
1/2 c. blueberries

DIRECTIONS:
1. Preheat oven to 375 degrees and prepare a 12 cup muffin tin.
2. In medium bowl, combine wheat germ and milk and soak for 10 minutes.
3. In large bowl, combine applesauce, yogurt, egg, vanilla and Splenda, whisking to combine well.
4. In medium bowl, add flour, powder, soda, salt and whisk to combine; set aside.
5. Add bran mixture to wet ingredients, as well as dry ingredients and gently fold in until just combined.
6. Fold blueberries into the mixture.
7. Spoon batter into prepared muffin cups, dividing equally. Place in oven and bake for 15 minutes or until toothpick inserted into center of a muffin comes out clean.
8. Remove from oven and let cool for 10 minutes in tins. Place on wire rack and let cool completely.
REVIEW:
I found these to be a good, healthy snack that was easy to grab on the go. I stored them in my freezer and zapped in the microwave for 15 seconds to defrost when I wanted one. Ok, fine. So these were a tad dry (after they were frozen). But that didn't bother me, because they were 90 cal/1 g fat / 14 g carb / 2 g fiber / 5 g protein each. A good simple recipe that I'll tweak a bit in the future (the original recipe called for mashed banana - I think I'll leave that in next time).

Taco Pasta Salad

This pasta salad has received great reviews on other blogs, so I had it on my list of things to try. When Josh and I were headed to a BBQ this past weekend, I knew just what to bring for our dish to pass. This salad is reminiscent of a taco salad - minus the Doritos and lettuce. Which means, the leftovers save well :) I also really liked the fact that there were a lot of non-traditional BBQ-salad components: beans, corn, avocado and cilantro with a chili-lime vinaigrette. And no mayo meant I wasn't concerned about how long it was out. There was a TON of food at this BBQ so I took no offense to the fact that I had plenty to bring home - beware, this recipe definitely makes enough for a crowd!

Wagon Wheel Taco Pasta Salad
recipe from Cara's Cravings

1lb wagon wheel pasta (could not find this, so I used 1 lb radiatore, any small shape will do)
1 can black beans, drained and rinsed
1 10oz package frozen corn (I don't even bother thawing it, because I always make this at least a few hours before serving, so it plenty of time to defrost)
2 medium tomatoes, seeded and diced
8oz shredded Mexican-blend cheese
1 1/2 cups salsa
1/2 cup olive oil (I cut back to about 1/3 c)
3-4 tbsp lime juice
1 tbsp cumin
1-2 tsp chili powder
2 garlic cloves, minced
freshly ground salt & pepper
1/2 cup chopped fresh cilantro
1 avocado, diced

DIRECTIONS:
1. Cook the pasta al dente according to package directions. Drain and rinse with cold water.
2. In a large bowl, combine the black beans, corn, tomatoes, salsa, and cheese. Add the cooled pasta and mix well.
3. In another bowl, whisk together the olive oil, lime juice, garlic, cumin and chili powder. Pour over the pasta salad, add the cilantro, and mix well. Season to taste with salt & pepper.
4. Just before serving, stir in the diced avocado.
REVIEW:
Very good and well received with the crowd. Its not too spicy, but has a good flavor from the chili powder and lime juice. If I weren't watching my carbs, I'd make a batch of this just to eat at home (add some grilled chicken for a complete meal)!

Sunday, July 26, 2009

Awesome Spiced-BBQ Baby Back Ribs

I picked up some ribs when they were on sale, and wanted to do more than just throw some BBQ sauce on them. Ideally, we would grill these really slowly, but we started dinner too late so I boiled the ribs for about 20 minutes first before Josh finished them on the grill for another 20 minutes or so (I know, I know... you shouldn't boil ribs. But we didn't have time to grill them forever!). This recipe really added a depth of flavor beyond the BBQ sauce - they tasted amazing!

Prize-Winning Baby Back Ribs
from allrecipes

1 tbsp ground cumin
1 tbsp chili powder
1 tbsp paprika
salt and pepper to taste (I barely used any of either)
3 pounds baby back pork ribs
1 c barbeque sauce (I mixed some Jack Daniels and Open Pit together)DIRECTIONS:
  1. Preheat grill for high heat.
  2. In a small jar, combine cumin, chili powder, paprika, salt, and pepper. Close the lid, and shake to mix.
  3. Trim the membrane sheath from the back of each rack. Run a small, sharp knife between the membrane and each rib, and snip off the membrane as much as possible. Sprinkle as much of the rub onto both sides of the ribs as desired. To prevent the ribs from becoming too dark and spicy, do not thoroughly rub the spices into the ribs. Store the unused portion of the spice mix for future use.
  4. Place aluminum foil on lower rack to capture drippings and prevent flare-ups. Lightly oil grate, and lay ribs on top rack of grill. Reduce heat to low, close lid, and leave undisturbed for 1 hour. Do not lift lid at all.
  5. Brush ribs with barbecue sauce, and grill an additional 5-15 minutes. Serve ribs as whole rack, or cut between each rib bone and pile individually on a platter.
REVIEW:
These were awesome (yes, even though I boiled them first). I served with some grilled corn and Italian green beans for a very satisfying dinner!

CI's Thick and Chewy Chocolate Chip Cookies

Last time I made some CCCs, The Chewy recipe was all the rage and I just had to try it. Before Alton Brown's The Chewy came about, I had seen the Cooks Illustrated recipe floating about as the best CCC recipe out there, and marked it to try. I finally got around to making it (over a month ago now) - and it is quite an impressive cookie. I'm not sure which I would say is better - I would have to try them head to head to decide. (Which, actually, someone did!)

Thick and Chewy Chocolate Chip Cookies
from Cooks Illustrated
Makes 1½ dozen 3-inch cookies

CI note: These truly chewy chocolate chip cookies are delicious served warm from the oven or cooled. To ensure a chewy texture, leave the cookies on the cookie sheet to cool. You can substitute white, milk chocolate, or peanut butter chips for the semi- or bittersweet chips called for in the recipe. In addition to chips, you can flavor the dough with one cup of nuts, raisins, or shredded coconut.

2⅛ c bleached all-purpose flour (about 10½ ounces)
½ tsp table salt
½ tsp baking soda
12 tsp unsalted butter (1½ sticks), melted and cooled slightly
1 c brown sugar (light or dark), 7 ounces
½ c granulated sugar (3½ ounces)
1 large egg
1 large egg yolk
2 tsp vanilla extract
1-2 c chocolate chips or chunks (semi or bittersweet)

DIRECTIONS:
1. Heat oven to 325F. Adjust oven racks to upper- and lower-middle positions. Mix flour, salt, and baking soda together in medium bowl; set aside.

2. Either by hand or with electric mixer, mix butter and sugars until thoroughly blended. Mix in egg, yolk, and vanilla. Add dry ingredients; mix until just combined. Stir in chips.

3. Form scant ¼ cup dough into ball. Holding dough ball using fingertips of both hands, pull into two equal halves. Rotate halves ninety degrees and, with jagged surfaces exposed, join halves together at their base, again forming a single cookie, being careful not to smooth dough’s uneven surface. Place formed dough onto one of two parchment paper-lined 20-by-14-inch lipless cookie sheets, about nine dough balls per sheet. Smaller cookie sheets can be used, but fewer cookies can be baked at one time and baking time may need to be adjusted. (Dough can be refrigerated up to 2 days or frozen up to 1 month – shaped or not.)

4. Bake, reversing cookie sheets’ positions halfway through baking, until cookies are light golden brown and outer edges start to harden yet centers are still soft and puffy, 15 to 18 minutes (start checking at 13 minutes). (Frozen dough requires an extra 1 to 2 minutes baking time.) Cool cookies on cookie sheets. Serve or store in airtight container.

REVIEW:
Yum! These really were thick and chewy, and definitely a recipe I would make again!

Key Lime Cake

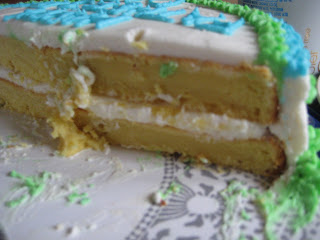
The first half of June is celebration-heavy in my family, with my sister's birthday, my mom's birthday, and Father's Day all within 2 weeks of each other. We headed to my parents for a BBQ to celebrate all of the above, and I volunteered to bring dessert: cake and cookies. The cookies were a back-up option because I wanted to try a non-traditional cake - Key Lime cake. I had seen key lime recipes popping up lately, and I wanted a twist on the traditional pie.

This cake was DENSE. I have no idea if it was supposed to be this way or not. The recipe does call for a box of pudding, so that could be the cause. The taste was also quite powerful - the cake and buttercream were very tart. It wasn't bad per se, but it also didn't quite satisfy a craving for birthday cake. If I were to make this again, I would play around with the recipe a bit (half the pudding mix?), and probably leave the key lime juice out of the frosting. Or, I would use this buttercream on a different cake - maybe raspberry?
Key Lime Cake with Key Lime Buttercream
recipe from cakecentral.com

Key Lime Cake:
1 (18.25oz.) lemon or yellow cake mix
1 3.5oz. box instant lemon pudding mix (dry)
4 large eggs
1/2 cup key lime juice (bottled or fresh squeezed)
1 cup vegetable oil (I subbed 1/2 with applesauce)
1/2 cup water

Key Lime Buttercream: (I cut this in half, and had plenty of frosting)
1 cup unsalted butter
1 cup Crisco
2 teaspoons real vanilla
1/4 teaspoon salt
8 cups powdered sugar
6 tablespoons key lime juice (more if desired for consistency and flavor)

DIRECTIONS:
1. Preheat oven to 325 degrees.
2. Combine above ingredients and beat with electric mixer for 2-3 minutes
3. Pour into prepared pans (2 8" or 9" rounds) and bake for 45 min. or until done (mine did not take this long - check at 35 min). Cool for 10 minutes and turn out from pans.

4. For the buttercream, beat butter and shortening together for about 5 minutes. Beat in vanilla and salt. Add powdered sugar 1 cup at a time alternating with the key lime juice. Decorate cake as desired.

REVIEW:
As I said before, this was ok. It was definitely more tart than sweet, and I can't help but think I messed something up given how dense the cake was. Oh well, it was a new recipe for me and I'll never learn if I don't try new things! It was also an excuse to practice some cake decorating - obviously I still need to work on my printing....

Monday, July 6, 2009

Bunless Turkey Burgers with Tomato-Avocado Salsa


I thawed some ground turkey the other day, and since its the middle of grilling season, burgers it was. I have no qualms about mixing things right into my burger meat, and turkey burgers do need some add-ins to keep them moist and flavorful. You can really experiment with the seasonings I have listed here and adjust to what you have on hand. The onion really helps keep the burgers moist, and the red pepper flakes add the right amount of spice without being too hot; but certainly adapt to your own tastes!

A side note: I don't eat buns. Not on my burgers or my hot dogs/sausages. (Admittedly, I do it mostly to save on the calories and carbs, and I would rather load up on some flavorful toppings.) Since we don't have burgers that often and I wasn't about to buy a pack of buns for just Josh, he also had a bun-less fate this evening. Having said that, I'm sure there are plenty of carby-rolls that this burger would be yummy on, but lettuce does it for us!

Turkey Burgers with Tomato-Avocado Salsa
burger adapted from Rachel Ray's 365: No Repeats (Cacciatore Burger)

For the burgers:
~1.3 lb ground turkey (could also use ground chicken)
1 egg white
3 Tbsp parmesan cheese
1/4 c. chopped onion
1 tsp. crushed red pepper flakes
1 tsp. salt
1/4 tsp. fresh ground black pepper
1 Tbsp. fresh chopped parsley
1 Tbsp. fresh chopped basil
2 cloves garlic, pressed or chopped
2 tsp. worcestershire sauce

For the salsa
1 vine ripe tomato, seeded and chopped
1/4 of an avocado, chopped
1 Tbsp. cilantro, chopped
splash of lime juice (juice from 1/2 lime is plenty)

DIRECTIONS:

1. In a bowl, mix turkey with all burger ingredients listed. Work the ingredients into the meat, but don't over-mix - your meat will become tough. Divide the mixture into 4 sections and shape into burger patties.
2. Grill patties until they are cooked throughout - this is poultry, there is no medium-rare here!! Pink is a bad thing!
3. While grilling, combine salsa ingredients in a small bowl.
4. When done, plate your burgers and top with a heaping spoonful of the salsa. Enjoy!
REVIEW:
These were great! My patties were a little puffy, but putting a thumb-indent in the middle of them before grilling would help with that. We served with some grilled zucchini and summer squash, and it was an awesome light, summery dinner, and came together rather quickly!


Garden surplus: Cilantro Pesto

Our garden is now producing at a rate we can't keep up with, and I had a bunch of spinach and cilantro to use. I made spinach pesto before, so I got the idea to make some cilantro pesto. I found a recipe on Food alla Puttanesca, and lightened it up a bit.

Because we weren't about to have a huge dinner of various-pesto pastas, I portioned each pesto out into an ice cube tray and froze them. I transferred each kind to a Ziploc and put it back in the freezer. It is super easy to grab and few to thaw them and toss with pasta, put on a sandwich, or over chicken breast!Cilantro Pesto
adapted from Food alla Puttanesca

2 to 3 cups cilantro, packed
1/3 c. grated Parmesan cheese
1/3 c. walnuts
1/3 c. olive oil
2 Tbsp. water
3 large garlic cloves
salt and pepper to taste

DIRECTIONS:
1. In a food processor, combine cilantro, walnuts, and garlic. Pulse to combine.
2. Slowly add olive oil in a stream while food processor is running, scraping down the sides of the food processor as needed. Add the cheese and pulse again until blended. Add salt and pepper to taste.