Monday, March 30, 2009

Cream Cheese Frosting

This is an excellent cream cheese frosting. Not grainy, not too sweet. From Simply Recipes. I used it on Orange-Vanilla cupcakes and it was fabulous!Cream Cheese frosting
probably enough for ~24 cupcakes?


1/2 c. of butter (1 stick), room temperature
8 oz of Philly cream cheese (1 package), room temperature (I used 1/3 less fat)
2 - 3 c. of powdered sugar
1 tsp. of vanilla extract (I added 1/2 tsp. vanilla extract and 1/2 tsp. orange juice since I was frosting orange cupcakes)

DIRECTIONS:
1. With an electric mixer, mix the butter and cream cheese together, about 3 minutes on medium speed until very smooth. Scrape down the sides and bottom of the bowl to ensure even mixing.
2. Add the vanilla extract and mix. Slowly add the powdered sugar. Keep adding until you get to desired sweetness.

3. Either spread on with a blunt knife or spatula, or spoon into a piping bag to decorate your cake or cupcake.

REVIEW:
Very smooth. Not too sweet. The perfect touch for cakes and cupcakes.

Vanilla-Orange Cupcakes

I wanted to bring some cupcakes into work for my birthday (no I'm not in elementary school, but my co-workers love treats and expect them on special occasions...). Karen found this recipe via Shawna, and they both found ways to lighten up a regular vanilla cupcake. The orange is perfect for spring! I used this cream cheese frosting to top them with.
Orange-Vanilla Cupcakes
made ~15 cupcakes

½ c. unsalted butter, softened
2/3 c. sugar
3 large eggs
1 tsp. Vanilla extract (Shawna used orange extract, but I didn't have any)
Zest of 1 large orange (about 2 Tbsp)
1 ½ c. all purpose flour
1 ½ tsp. Baking powder
¼ tsp. Salt
¼ c. milk (I used skim)

DIRECTIONS:
1. Preheat oven to 350 degrees F and lightly butter or line 12 muffin cups with paper liners.
2. Cream the butter and sugar until light and fluffy. Add the eggs, one at a time, beating well after each addition. Beat in the vanilla extract and orange zest.
3. In a separate bowl whisk together the flour, baking powder, and salt.
4. With the mixer on low speed, alternately add the flour mixture and milk, in three additions, beginning and ending with the flour. Scrape down the sides of the bowl.
5. Evenly fill the muffin cups with the batter and bake for about 18-20 minutes or until nicely
browned and a toothpick inserted into a cupcake comes out clean. (DO NOT OVERBAKE.) Remove from oven and place on a wire rack to cool. Once the cupcakes have completely cooled, frost with icing. If you want flat topped cupcakes then slice off the dome of each cupcake, with a sharp knife, before frosting.

REVIEW:
The flavors in these are really nice and light. Mine came out a tad dry, but after consulting with some other ladies and Karen, it sounds like I overbaked them a bit. They stayed light in color, but I think they were done. I was too lazy to do the toothpick test. So you should do the toothpick test. That will save these glorious cupcakes! I topped with cream cheese frosting and some orange sugar, and they were still yummy.

Taco Soup in the Crockpot

We love Mexican. Its our go-to cuisine. Plus, the meals are usually pretty cheap to put together. There are a bunch of taco soup recipes out there, but the crockpot lady said this one was best for the crockpot, so we went for it. I have a 5 qt (I think) crockpot, so I modified the quantities a bit.Taco Soup
serves a lot

2 cans of kidney beans (I used 1)
2 cans of pinto beans (I used 1)
2 cans of corn (I used 1)
1 large can of diced tomatoes
1 can tomatoes and chiles (I just added a small can of chopped chilis)
1 packet taco seasoning
1 packet ranch dressing mix
1 lb browned ground turkey/chicken/beef, optional (I used ground turkey)
shredded cheese and sour cream for topping (chopped green onion would be good too, but I didn't have any)

DIRECTIONS:
1. Brown meat if you are going to use it. Drain the fat and add meat to crockpot stoneware insert.
2. Sprinkle seasoning packets on top of meat
3. Drain and rinse the beans and add
4. Add the ENTIRE contents of the corn and tomato cans. (Since I only used 1 can of tomatoes I also added about a 1/2 cup water for a little more liquid.)
5. Stir.
6. Cover and cook on low for 8-10 hours or on high for 4-5. I think the longer you cook soup, the better, so if you have the time, opt for cooking on low. Stir well, and serve with a handful of shredded cheese and a dollop of sour cream (and green onion if you have it).

REVIEW:
Yep, another winner. And the crockpot makes it so easy. I know its not gourmet, but this makes us happy. Josh had his with some tortilla chips on top too.

Sunday, March 29, 2009

Peanut Butter Banana Nut Muffins (sort of)

I wanted to make some muffins to grab for breakfast each morning. I was looking for something a little healthier, so I checked out Karen's blog and found these. Karen is great at adapting recipes and making them healthier by using Splenda and whole wheat flour, so I followed most of her changes. She used mini chocolate chips, but I subbed some peanut butter chips and walnuts instead (to make a peanut butter-banana, banana nut combo).Oh yeah, and she remembered to put baking soda in hers. What a rookie mistake I made! Mine didn't rise at all so they don't look very appetizing, but they taste pretty good, and I certainly won't feel as guilty eating these as I would with other muffins out there.

Healthier Banana Nut Muffins
made 15 cupcake-size muffins

1.5 c. mashed fresh banana
2 large eggs
1 c. granulated sugar (I used Splenda)
1/2 c. salted butter, softened
1/2 c. 1% milk (I used skim)
1 tsp baking soda (you really don't want to forget this when baking....)
1 tsp vanilla abstract
1.25 c. whole wheat flour
1.25 c. white flour
1/2 c. mini chocolate chips (I used 1/4 c. peanut butter chips)
1/2 c. chopped pecans (I used 1/4 c. chopped walnuts)

DIRECTIONS:
1. Preheat oven to 350 degrees F.
2. Mix together sugar and butter. Add banana, milk, eggs, vanilla. Slowly add dry ingredients. Add chocolate chips and nuts if desired.
3. Place liners in muffin tins and fill. I baked by cupcake-sized muffins or ~25 min.

(Makes 2 eight inch loaves or 12 large muffins. Cook at 350 degrees until knife comes out clean. 60 minutes for a loaf, 25-35 minutes for large muffins.)

REVIEW:
The substitution of Splenda and whole wheat flour is great in these. And I really liked my peanut butter-banana-nut combo. Maybe next time I can actually follow the recipe. I planned to freeze some of these, and I can just pull them out the night before work for breakfast the next morning.

Curried Chicken Salad

I was watching the Food Network on Saturday morning, and Ellie made this on her show. I had just bought some red grapes, so I decided to make some for dinner tonight and for me to take to work for lunches this week.Curried Chicken Salad
~4 servings

1 1/4 lbs boneless skinless chicken breast halves, cooked (I poached mine)
1/4 c. sliced almonds
1/2 c. nonfat plain yogurt
2 Tbsp mayonnaise (I used light)
1 tsp curry powder
1 c. halved red grapes (I also added 1 stalk chopped celery for some added crunch)
1/4 c. chopped cilantro leaves
Salt and freshly ground black pepper

DIRECTIONS:
1. Cut the chicken into 1/4-inch dice (mine was a little larger). Toast the almonds in a small dry skillet over medium-high heat until fragrant and beginning to turn golden, 2 to 3 minutes.
2. In a large bowl, stir together the yogurt, mayonnaise, and curry powder. Fold in the chicken, grapes and cilantro (and celery) and season, to taste, with salt and pepper.
3. Serve in a sandwich or pita, plain in a bowl, or on top of some greens tossed with a little olive oil and lemon juice. Top the chicken salad with some of the toasted almonds. Enjoy!REVIEW:
This was only ok. I'm going to keep my eyes open for more chicken salad recipes that are light on the mayo. The curry and cilantro flavors were kind of over-powering in this dish. It is packed with protein though, and is a nice and healthy version of chicken salad.

Shrimp Linguine with Spinach Sauce

I knew I wanted to make shrimp pasta for dinner on Friday, so I was off to look for a new sauce to try. I found a penne with spinach sauce recipe from Giada, and modified the whole thing a bit to fit my needs. My recipe is below, but I linked her original. I added shrimp, mushrooms, and tomatoes to the pasta to make a full meal. This sauce has a lot of garlic in it, and is stays raw - so if you don't like the taste of raw garlic, you will not like this. I thought it was really good though! (Please excuse the picture. Its spinach sauce! I just doesn't look pretty!)Shrimp Linguine with Spinach Sauce
serves 6 as written, I made half

1 lb. linguine, I used whole wheat
~40 medium sized sprimp, cooked with tails removed
~2 c. sliced mushrooms, I used portabella
~1.5 c. chopped tomatoes, I used roma
2 Tbsp. chopped basil

Sauce:
3 garlic cloves, peeled
2 oz. reduced fat cream cheese
3/4 tsp. salt
1/2 tsp. freshly ground black pepper
4 oz. fresh baby spinach leaves
1/4 c. grated parmesan cheese
~3 Tbsp. olive oil

DIRECTIONS:
1. Cook the linguine according to package directions.
2. Saute the mushrooms in a small drizzle of olive oil for ~5 min, and tomatoes and shrimp for the last minute to heat through.
3. In a food processor, chop the garlic cloves. Add the cream cheese, salt, pepper, spinach, and parmesan cheese and process for 20 seconds. Stream in 2-4 Tbsp. olive oil until you are happy with the consistency. You want it thick, but not like a paste. You could also use some of the starchy pasta water to thin it out if you want a smoother texture but don't want to add too much extra fat. (I used 2 Tbsp EVOO and about 2 Tbsp of the pasta water.)
4. Drain the linguine, and toss with the mushrooms, shrimp and tomatoes. Top with the sauce and toss to distribute throughout the dish. Sprinkle basil on top and enjoy!
REVIEW:
We liked this a lot, but it is a raw sauce so the spinach and garlic tastes are STRONG. It didn't help that I made too much sauce for how much pasta I made (I didn't cut the sauce part in half) - I definitely could have saved some of it for another time. Another successful Lenten meal! You could use chicken instead though, and that would be good as well.

Thursday, March 26, 2009

PW's Onion Straws

I saw these on Pioneer Woman's blog recently when she did a favorites post. I love these at restaurants and Josh was up for breaking out our mini fryer, so we gave it a shot. Plus I had some buttermilk left over from Irish Soda Bread last week and this was the perfect use for it. Plus plus, I haven't followed my diet this week since I made Cake Pops, so it was the right opportunity to splurge.Crispy Onion Straws
serves 2-4 (?)

1 large onion (I used a "big" onion and a medium onion. One would have been enough.)
2 c. buttermilk (I used 1 c. buttermilk and ~1.5 c. milk)
2 c. flour (I needed about 3.5 cups to coat all my onion slices!)
1 Tbsp salt
Lots of black pepper
1/4 to 1/2 teaspoon Cayenne Pepper
Canola Oil

DIRECTIONS:
1. Slice onion very thin. Place in a baking dish and cover with buttermilk for at least one hour.
2. Combine dry ingredients and set aside.
3. Heat oil to 375 degrees.
4. Grab a handful of onions, throw into the flour mixture, tab to shake off excess, and plunge into hot oil. (I used tongs and they worked out great.) Fry for a few minutes (~3) and remove as soon as golden brown. Set on a paper towel lined plate to absorb excess oil.5. Repeat until onions all onion slices are fried. Serve as a side, on a burger, or alone. Enjoy!
REVIEW:
We loved these. But they will be a rare treat given the lack of nutritional value. We had them with paninis, and had more than we should have :/ They didn't reheat well though (soggy), so don't bother making extra for another day.

Wednesday, March 25, 2009

Bakerella's Cake Pops

I've been following food blogs for a few months, and I knew at some point I would be making these. They are just so darn cute! In this batch, I made:
Cupcake bites:"Spring" Cake Pops:

and Cake "truffles":Bakerella is the master here, so I defer all questions and instructions to her. Cupcake bites are explained in the previous link, and all things cake pop related are here. She really has some FABULOUS ideas on her site, so you should check that out. I'm still going to post some pictures and comments, because well, I took a ton of pics and had fun making these!

You start by making a standard 9 x 13" cake, flavor of your choice, and crumbling it into a bowl. Then stir in about 3/4 of a can of frosting. This could be messy, but keep going. This time I used a box mix and store bought frosting, but in the future I might take the time to make my own. These are a chocolate cake/vanilla frosting mix.

Then, for the cupcake bites and cake truffles, roll the mixture into balls. I used heaping scoops with my small cookie scoop. Place these on some wax paper and then set in the fridge or freezer for a while to set. By the way, did I mention this commentary is just to explain my pictures? If you really want to know what to do, Bakerella explains it better.

Anyways, for the cake pops, I used small fondant cutters to make the shapes. The bigger and less detailed the shape, the better. Trust me on this one. I made a lot of "blob" pops.For the cupcake bites, put a little chocolate in a candy mold, then set the balls in the chocolate to make the bottom. Put the mold in the fridge until the chocolate sets. (Bakerella has picture by picture instructions. I don't. I'm not Bakerella.)
Once the bottom chocolate has set, dip the top of the circle in a colored chocolate for the icing of the cupcake. I thought my green turned out kind of blah, but I was really happy with the blue. I topped with colored non-pariels, and a candy coated chocolate (imatation M&Ms).Ta-da! Cupcake bite perfection!!!For the truffles, I just dipped balls in chocolate, and set them on wax paper to harden. Then I drizzled some white chocolate on top to make them pretty. Aren't they pretty? I took these into work and got some fabulous comments on them!
All this started as a treat for my sister-in-law's birthday (Happy Bday Sarah!). Some family was getting together, so I brought the cupcake bites for dessert. I had this idea in my head that I could make cake pops in the shapes of flowers coming out of a flower pot. It looked a little better in my head, but it still turned out pretty cool.

I put some styrofoam in the mini flower pot, and iced the top of it. I put some extra cake crumbs on top of the icing for the "dirt". Not all of the cake-pops turned out to be gift-able. Check out some of my lessons learned at the end of the post for some "no-duh" tips.

Josh thought he could tie a prettier bow than me. We both need practice in pretty-bow tying.
His bow won.

So, I had fun with this (and I impressed my in-laws!). I learned a few things along the way too. Some of these things may seem obvious... but when you have a counter top full of cake balls, sticks, bowls of chocolate, sprinkles and M&Ms, your judgement can be clouded. Or you could be on a sugar high. From the fumes. Not because you had to test-eat any of the cake pops.

Lesson's Learned in Round 1 of Bakerella Cake Pop Making:
1. Red chocolate + Blue chocolate = a really ugly shade of purple chocolate. I need to invest in some Wilton gel colors before the next go around. Or buy purple chocolate (yes, they make that).
2. Butterfly cut-outs fall off sucker sticks when dipped in chocolate 7 out of 10 times. All shapes need a good strong center, and the butterflies skinny body just doesn't cut it.
3. Detailed shapes don't work. The more exaggerated the shape, the better it turns out after being dipped in chocolate. My tulips looked more like fists than flowers. Hopefully the flower pot gave them away. The butterflies just looked like blobs.
4. Colored sprinkles don't show up on dark chocolate.
5. Chocolate dries fast. Apply sprinkles ASAP!
6. I really can't tie a pretty bow. Mom, help!
7. Some things just turn out better in my head. At least I could find a few pops that were still passable.

Thats officially the longest post I've ever written. Hope you enjoyed it!
Yummy!

Garlic and Herb Pot Poast

A while back, I tried to cook a beef eye roast and wasn't really happy with it. It tasted fine, but I decided I wouldn't buy that cut of meat again. You'll never guess what I found in my freezer... apparently it was on sale some other time (January according to the date I wrote on the bag) and I stashed it away. I figured this time we would try it in the crock pot. This roast came out quite moist, but I would still recommend a different cut of beef with it.

Garlic and Herb Pot Roast
serves 4-6

~3 lb roast
2 packets onion soup mix (I used the Lipton Herb and Garlic Onion Soup mix, it comes 2 packets to a box)
3 stalks celery, cut into 1 inch pieces
2 small white onions, quartered
1/2 cup carrot pieces (I cut bagged carrot sticks in half)
3 small red potatoes, quartered
4 cloves garlic peeled
1/2 c. beef broth
1/2 c. waterNote: if you have a bigger crock pot, you can up the veggies to help fill the space. I love the veggies, but I am space limited with my 4 (or maybe 5?) qt. crock. Skip in veggies you don't like. I add the potatoes to satisfy my hubby ;)

DIRECTIONS:
1. Put veggies and garlic in crock pot. Set cut of beef on top of veggies. Sprinkle seasoning packet over beef and veggies. Pour beef broth and water over everything.
2. Cook on low 8-10 hours. Remove the veggies and beef from the broth. Slice and serve. You could use the broth to make a gravy, but I didn't.
REVIEW:
The flavors were good and the meat was moist, but not as tender as I like. I think this is more due to the cut of meat than the recipe though. Just don't use an eye roast!

Sweet Potato Fries

This is one of my favorite snacks. And bonus: its fairly healthy! Sweet potatoes are a great alternative to regular potatoes, and they are rich in fiber, beta carotene, and vitamins C and B6.

Sweet Potato Fries
use 1 large sweet potato for every 2 people

1 (or more) large sweet potato(es)
coarse salt
chili powder
olive oil

1. Preheat oven to 425 deg F. Line a baking sheet with aluminum foil for easier clean-up.
2. Peel the sweet potato and cut into "fries." These can be hard to cut - the sharper the knife, the better! Try to make them as uniform in thickness as possible.
3. Toss with enough olive oil to coat (but not too much or else they will become soggy! Just enough so the seasoning sticks). Sprinkle with salt and chili powder and toss to coat the fries. I think these can take quite a bit of seasoning (~1 Tbsp of each or more), but it really depends on how spicy you want them. Spread in a single layer on the baking sheet.4. Bake for ~30 min. This will depend on how thick you cut the fries. Using a spatula, flip them over at about 15 min., then check on them every 5-10 min or so until they start to get dark edges. If the sizes are too different, the thin ones will burn and the thick ones will still be soggy :(
5. Remove from oven when they are slightly crispy and enjoy!
REVIEW:
There are sweet versions of sweet potato fries out there, but I prefer these. They are a great substitute to real fries and are a good side to lots of meals... or on their own!

Lemon and Herb Tilapia

Another Friday during Lent. Josh was having some meaty leftovers, so I decided to quickly pan-fry some tilapia filets for myself. These only take a few minutes, and I just picked some spices I had on hand. I used Italian style herbs, but you could also use cajun seasoning or a citrus blend.Lemon and Herb Pan-fried Tilapia
serves 1 as written

2 small tilapia filets
2 tsp. Italian seasoning
freshly ground black pepper
2 Tbsp. lemon juice

DIRECTIONS:
1. Heat a drizzle of olive oil in a small skillet over medium heat. Dry the tilapia filets with a paper towel to remove excess moisture (this will help them get a nice color on the outside).
2. Rub the Italian seasoning on each side of each filet and pan fry for a few minutes on each side.
3. Remove from pan and top with freshly ground black pepper and lemon juice. Enjoy!

REVIEW:
This was nice and light, and very easy. I like to keep a bag of individually vacuum packed tilapia filets in the freezer - just defrost in the fridge a day ahead of time. You could serve it over rice, and with a veggie for a more complete meal. Or you could have a big bowl of popcorn after dinner like I did. :)

Thursday, March 19, 2009

Turkey and Artichoke Stuffed Shells

Originally a Giada recipe, I came across this on the Cooking This and That blog. Colleen made the whole recipe and provides a great explanation of how to freeze half of it for another time. I cut it in half, and was still able to stuff 15 (very full) shells. This recipe makes a lot of food!

The artichokes are wonderful in this recipe and they aren't overpowering. You could easily sub the ground turkey for ground chicken if thats what you have on hand. I didn't have any pancetta for the Arrabbiata sauce, so I just jazzed up some tomato sauce with the garlic and red pepper flakes and it was still great. And I just want to say: I really wish I could find some wheat pasta shells at my chain-grocery stores. I would feel a little less guilty...
Turkey and Artichoke Stuffed Shells with Arrabbiata Sauce
serves 6-8 as written (I halved it and still made 15 shells), from Giada De Laurentiis

1 12-oz box jumbo pasta shells
3 Tbsp extra-virgin olive oil
1/2 large yellow onion, chopped (about 1 cup)
3 cloves garlic, chopped (I used 3 in my halved recipe, we like garlic!)
1 lb ground turkey
1/2 teaspoon kosher salt, plus 1/2 teaspoon
1/4 teaspoon freshly ground black pepper, plus 1/4 teaspoon
1 (8 to 10-oz) package frozen artichokes, thawed and coarsely chopped (I used canned)
1 (15-oz) container ricotta cheese
3/4 c. grated Parmesan
2 eggs, lightly beaten
1/4 c. chopped fresh basil leaves
2 Tbsp chopped fresh flat-leaf parsley (I omitted)
5 cups Arrabbiata Sauce, recipe follows
1 1/2 cups grated mozzarella (I used an Italian blend bag of shredded cheese)

DIRECTIONS:
1. Preheat oven to 400 deg F. Bring a large pot of salted water to a boil over high heat. Add the pasta and partially cook until tender but still very firm to the bite, stirring occasionally. Drain pasta.
2. Meanwhile, in a large heavy skillet, heat the olive oil over medium-high heat. Add the onions and the garlic and cook until the onions are soft and starting to brown, about 3 minutes. Add the ground turkey, 1/2 teaspoon salt, and 1/4 teaspoon black pepper and continue to cook, stirring occasionally, until the meat is slightly golden and cooked through. Add the artichoke hearts and stir to combine. Remove from heat and let cool. (Now is a good time to start the sauce, recipe below.)
3. In a large bowl combine the cooled turkey mixture with the ricotta cheese, Parmesan cheese, eggs, basil, parsley, and the remaining salt and pepper. Stir to combine. (I also added ~1 tsp. Italian seasoning.)
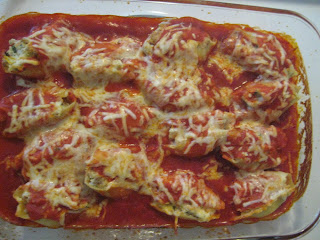
4. To stuff the shells, cover the bottom of a 9x13-inch baking dish with 1 cup of Arrabbiata sauce (I still used this size baking dish). Take a shell in the palm of your hand and stuff it with a large spoonful of turkey mixture, about 2-3 tablespoons. Place the stuffed shell in the baking dish. Continue filling the shells until the baking dish is full, about 24-30 shells. Drizzle the remaining Arrabbiata Sauce over the shells, top with the grated mozzarella.
5. Bake at 400 deg F until the shells are warmed through and the cheese is beginning to brown, about 20-25 minutes.

Arrabbiata Sauce
2 tablespoons extra-virgin olive oil
6 ounces sliced pancetta, coarsely chopped (I omitted)
2 teaspoons crushed red pepper flakes
2 garlic cloves, minced (I still used 2 even though I only made ~ 3.5 cups sauce)
5 cups jarred or fresh marinara sauce (I used a 29 oz can of tomato sauce)

1. Heat the olive oil in medium pot over medium heat. Add the pancetta and saute until golden brown, about 5 minutes. Add the garlic and saute until tender, about 1 minute. Add the marinara sauce and red pepper flakes and bring to a simmer. Remove from heat and let cool until ready to use.REVIEW:
Josh wasn't home to eat this, but I really liked it! But then again, I like pasta. The flavors were really good, and this wasn't overly heavy. I was too lazy, but I would suggest serving with garlic bread and a green veggie.

Reubens

What to do with leftover corned beef? Make Reuben sandwiches of course! We used our Griddler to toast these up. I much prefer eating corned beef this way - the flavors were much more subtle and mellowed out a bit with the dressing and cheese.

Reuben Sandwiches
I know, you probably don't really need a recipe, right?

For each sandwich:
2 slices rye bread (we used wheat)
Thousand Island dressing (we didn't have any, so I mixed up 1 Tbsp each ketchup and mayo with a splash of pickle juice and some garlic powder and it was sufficient)
2 slices Swiss cheese
Sliced corned beef - deli, or slow cooked
1/4 c. Sauerkraut
butter

DIRECTIONS:
1. Slather dressing on inside of each piece of bread. Layer cheese, corned beef, sauerkraut, and more cheese inside each sandwich.
2. Butter outside of each piece of bread before placing on griddle or panini press.
3. Grill until each side is golden and bread is toasted. Slice and serve. Enjoy!

Tuesday, March 17, 2009

Bacon, Potato and Cabbage Soup

I'm in the Irish spirit today, so to continue with our theme for dinner, I was determined to include some cabbage. I couldn't see us eating traditional cabbage, but I found this recipe online and it got GREAT reviews. I'm not sure I would call this the best soup I've ever had, but it was really good (even if the picture doesn't look it)!"Irish Bacon and Cabbage Soup" aka Bacon, Potato and Cabbage Soup
adapted from allrecipes, serves 4

1/2 lb Irish bacon, diced (what's Irish bacon???? I looked, but Meijer didn't have any. We used regular. Pancetta would work too.)
2 large potatoes, peeled and cubed (I used 4 smallish red-skin; cube pretty small so they don't take too long to cook)
1 15 oz can diced tomatoes with juice
1 c. chicken stock, or as needed (I needed 2 cups liquid, I used 1 c. homemade stock, and 1 c. water since the stock was strong)
salt and black pepper to taste
2 c. thinly sliced dark green Savoy cabbage leaves

DIRECTIONS:
1. Place bacon in medium-large saucepan. Cook over medium-high heat until evenly brown, drain off excess fat.
2. Stir in potatoes, tomatoes, and enough chicken stock/water to cover. Season with salt and pepper (this can handle quite a bit of seasoning, don't be shy!). Bring to a boil, reduce heat and let simmer 20 min or until potatoes are tender.
3. Stir in cabbage and allow soup to simmer a few minutes longer before serving. Enjoy!

REVIEW:
This was VERY good, we both liked it. And the recipe was really simple! The cabbage adds a nice bite tot he soup, without being too crunchy or "chewy." There weren't a lot of leftovers, so make a double-triple batch if you are serving a crowd or planned this as a main course. I served it with corned beef and Irish soda bread.

Corned Beef

In honor of St. Paddy's Day, I made corned beef. (And sauerkraut.)

Yes, mom. Seriously.

I'm not sure it I've ever had corned beef before, and if I have - I don't remember. I usually remember things I like. The same goes for sauerkraut. And Josh is in pretty much the same boat as me.

But I've been much more adventurous in the kitchen lately, so I wanted to try some traditional Irish fare. (We can debate the traditional part later- I'm sure there are crockpots in Ireland.) I can't say that either of us loved this dish, but we both ate it. It was just kind of salty - but I guess corned beef is. I am pretty excited to make Reuben sandwiches with the leftovers though.

Slow Cooked Corned Beef
adapted from allrecipes

2 (3 lb) corned beef briskets with spice packets (I only used 1 brisket)
2 12oz bottles of beer (obviously Guinness or an Irish red would be ideal... but I used Miller Light :/, and only 1 bottle )
2 bay leaves
1/4 c. peppercorns
1 bulb garlic cloves, separated and peeled (I ran out and only used about 5 cloves)
(I also added ~ 16 oz sauerkraut to the crockpot)

DIRECTIONS:
1. Toss everything in the crockpot (but only use 1 spice packet, or in my case 1/2 a spice packet). Add water so that the brisket is covered with liquid. Cook on low ~8 hours.
2. Carefully remove the meat from the pot and let rest for ~10 min. Slice against the grain or shred to serve. I strained the sauerkraut from the rest of the liquid and served alongside the meat. You could use the liquid to cook cabbage, but I discarded it. Enjoy!
REVIEW:
We thought this was ok, but I don't think it has anything to do with the recipe. The meat came out VERY tender. I think we will like it more on sandwiches than just plain like we ate it. I probably wont add the sauerkraut to the crockpot in the future, since I thought it came out saltier than it needed to be. I served this with Irish Soda Bread and Bacon and Cabbage Soup.

Sunday, March 15, 2009

Balsamic Roasted Pork Loin

I got a boneless pork loin on sale last week, and I was looking for a new recipe. I found this one which got really reviews, and I like cooking with balsamic vinegar. The pork roast came out very moist!
Balsamic Roasted Pork Loin
serves 6, but this would make enough marinade for a 3-4 pound roast

2 Tbsp steak seasoning rub (I used 1 Tbsp Mrs. Dash extra spicy and 1 Tbsp McCormick garlic rub)
1/2 c. balsamic vinegar
1/2 c. olive oil
~2 lb. boneless pork loin roast (mine was 1.8 lbs)

DIRECTIONS:
1. Dissolve seasoning in vinegar, then stir in olive oil. Place pork in a Ziploc bag and pour marinade over top. Marinate for 2 hours, or overnight.
2. Preheat oven to 350 deg F.
3. Place pork in glass baking dish along with marinade. Bake, basting occasionally, until internal temp of pork is 145 deg F, about 1 hour. Let roast rest for 10 min before slicing and serving. Enjoy!

REVIEW:
This was nice and moist, and the vinegar wasn't overpowering. Definitely something I would consider making again.

Irish Soda Bread

With St. Patrick's Day right around the corner, I have been planning an Irish menu for Josh and I next week. Its definitely something a little different for us, but why not give it a try?

I started off by making some Irish Soda Bread, a few days early. I don't know if I've ever had this before, so I'm not sure whats its supposed to taste like - but this was good! I found this recipe on allrecipes, and the reviews said it tastes pretty traditional. I added raisins which I think made a huge difference!
Irish Soda Bread

4 c. all-purpose flour
4 Tbsp granulated sugar
1 tsp baking soda
1 Tbsp baking powder
1/2 tsp salt
1/2 c. margarine, softened (I used butter)
1 c. buttermilk
1 egg
2/3 c. raisins
1/4 c. butter, melted (I used half of this)
1/4 c. buttermilk (I used half of this)

DIRECTIONS:
1. Preheat oven to 375 deg F. Lightly grease a baking sheet (I used nonstick).
2. In a large bowl, mix flour, sugar, soda, baking powder, salt and margarine. (I sifted dry ingredients together first, and used my kitchenaid mixer with the dough hook. It worked great).
3. Stir in 1 c. buttermilk and egg. (Still used the kitchenaid.)
4. Turn dough onto lightly floured surface and knead slightly. (This is where I added in the raisins - its hard to knead raisins evenly into the dough, so I ended up with some very raisin-heavy pockets!)
5. Form dough into rounded loaf and place it on the baking sheet.
6. Mix melted butter and 1/4 c. buttermilk in a small bowl and brush over the loaf (you only need 1/2 of this). Cut a good size "X" on top of the loaf.
7. Bake for 45-50 min, or until a toothpick inserted in the top of the loaf comes out clean. Enjoy!

REVIEW:
I don't make bread often, so I kind of winged it with this. This is a dense bread, but it isn't sweet. My crust came out kind of hard, but the bread itself is good and the raisins really add something. I've had a few pieces this afternoon.... hopefully there is still some left for Tuesday!

Red Lobster Biscuits

We had a really late lunch yesterday, so I just planned on sauteing some veggies for dinner. I wanted something to go with them, and I remembered seeing these on Lindsay's blog. I like the real thing, so I figured I would try these, plus I had everything on hand.
Red Lobster Garlic Cheddar Biscuits
I cut the following recipe in half and made 6 biscuits, so this makes ~12

2 c. Bisquick mix
1/2 c. shredded cheddar cheese (I would use 1 cup - I used 1/2 cup mild cheddar when I halved the recipe!)
2/3 c. milk
1/2 tsp garlic powder
1/2 tsp parsley
(I also added a dash of salt)
Butter

DIRECTIONS:
1. Preheat oven to 450 deg F.
2. Mix all ingredients until moist.
3. Drop onto greased cookie sheet (my clumps were ~1/3 cup each)
4. Bake for 8 min or until golden (I burned the bottoms of mine b/c I was waiting for them to get darker... watch yours carefully).
5. Spread butter on top while warm. Enjoy!

REVIEW:
I thought these were really good, but not quite the same as the real thing. Josh only had 1 because he was too busy eating apple pie for dinner :)